How to build a patio {part 3}: Building a retaining or seat wall
I have noticed a lot of you stopping by from Pinterest. Thanks for looking!
To catch you up to speed on our project:
{How to build a patio}
{How to trench a downspout}
{How to build a patio: part 2}
{How to build a pergola}
{How to build a patio: part 4}
______________________________________________
After we built our pergola we added a seat wall and columns to each pergola post. We knew that this entire patio project was going to be hard work. And hard work it is (that's an understatement!).
Basically, after we knew that the gravel floor was level, we started laying the columns and seat wall. {My previous blogs are some very important steps}
The seat wall and column stone we used are Highland Stone in Brownstone.
To make the columns we laid four column stones around the pergola post. To make the column just rotate the pattern, but the second layer was a little more tricky because we had to build the seat wall into the column, which required more cutting.


You can see in the photo below the second and fourth layers going into the column where there are no gaps. The first and third layers were cut up to the column.


To catch you up to speed on our project:
{How to build a patio}
{How to trench a downspout}
{How to build a patio: part 2}
{How to build a pergola}
{How to build a patio: part 4}
Building a retaining or seat wall
After we built our pergola we added a seat wall and columns to each pergola post. We knew that this entire patio project was going to be hard work. And hard work it is (that's an understatement!).
Basically, after we knew that the gravel floor was level, we started laying the columns and seat wall. {My previous blogs are some very important steps}
The seat wall and column stone we used are Highland Stone in Brownstone.
To make the columns we laid four column stones around the pergola post. To make the column just rotate the pattern, but the second layer was a little more tricky because we had to build the seat wall into the column, which required more cutting.

Next we started laying the seat wall. We took a string and made a straight line to follow. Building the wall, went pretty fast. The stone comes with three different sizes and we just alternated sizes, not making any specific pattern.
We had to cut the ends of the wall by each of the columns using a diamond saw blade. (which I found out, doesn't really have diamonds in it) Josh used a circular saw that only went through HALF the stones, he used a chisel and hammer to split the stone the rest of the way.
Like I mentioned above, one of the tricky parts of building the seat wall, is "anchoring" it to the column. On the second and fourth layer of the seat wall we built the wall into the column. Which made for a lot of extra cutting on the columns.

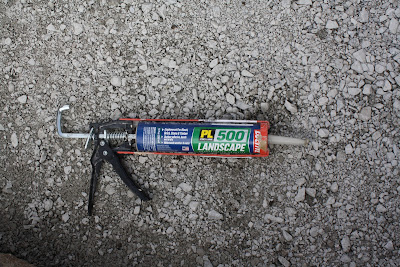
We attached the stone with Landscape glue. Which is extremely sticky stuff.

You can see in the photo below the second and fourth layers going into the column where there are no gaps. The first and third layers were cut up to the column.

Next we added the wall caps. We put these on using the landscape glue and made cuts at the end.

Our seat wall and pergola columns are done! We just need to add the column caps, but we haven't decided on what we want yet.
 |
| Excuse our mess! ;) |
You can also see in the photo above that we have started to lay the patio pavers. It's almost done, yahoo!

About how much did this project cost you in supplies altogether? It looks amazing, my husband and I have been saving up to do something similar but I have no idea what the price range is for something like this! Thanks so much for the step by steps!
ReplyDeleteHow do you replace the 4x4 posts if rot issues occur?
ReplyDeleteUse treated lumber marked suitable for inground use in the first place. Pressure treated wood shouldnt rot..
DeleteDo you need to make a foundation for the seating wall...like dig about 6 in. deep etc. to prevent tilting If not then your project is easier .
ReplyDeleteReplying to anonymous #1 about rot issues. Once they put slightly sloped column caps on, they will put a sealer around the seam where the wood meets the cap. That keeps water from seeping down. Also cedar resists rot. Just FYI.
ReplyDeletewhat kind of saw did you use to cut the blocks? did you rent it?
ReplyDeleteYou can see how we cut them in this post: http://hansenfamilychaos.blogspot.com/2012/05/how-to-build-patio-part-4-laying-pavers.html
DeleteBut he just used a circular saw and a chisel. We did not rent anything.
I am also curious about the cost.
ReplyDeleteI have read all of your posts on how to build a patio. My wife wants to build one in our backyard. I am going to use a lot of the tips I have learned while reading through your posts when I build mine. Thank you for sharing how you build your patio, and sharing all the great photos. http://lifestylepatios.com
ReplyDeleteThanks for explaining what you did to build this patio. It looks like it turned out great! You mentioned that you've started to lay the pavers. Do you happen to have a post explaining how you went about that?
ReplyDeleteMegan | http://lifestylepatios.com/services/patios/
It looks very nice,..
ReplyDeleteI just love this type of patio,
outdoor fireplaces Columbus ohio